This upcoming week I’ll be traveling to Grand Marais, Minnesota with fellow photographer Brian Stockton (bstockton.com) on an astrophotography adventure. Our 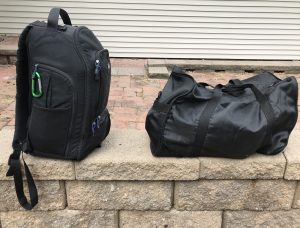 goals are to capture stunning shots of the Milky Way, Perseid meteor shower, star trails, and, perhaps if we’re lucky, some northern lights. It’s a trip we’ve been looking forward to for quite some time. Far northern Minnesota has some very unique and interesting landscapes that I’m sure will make for some great night skies photos. The skies in the Grand Marais area are extremely dark, perfect for starry night skies photography. So, while I was in the process of packing and preparing my gear it struck me that I should write up a blog about the astrophotography camera equipment I take on photo shoots like this. Without further ado, we’ll dive into the camera bag and see what I’ll be taking with me.
Camera and Lens
In order to have a successful astrophotography photo shoot the camera and lens you use is an important component. Most DSLR cameras and stock lenses can be used for night skies photography once you master the proper camera settings. However, if you really want your night skies photos to stand out, the camera and lens you choose is important. The camera I use for night skies, as well as all of my extreme weather and landscape photography, is the Nikon D750. This camera is great for night skies photography because of its full frame sensor that brings out the details of the night sky when used with the correct lens. The sensor also handles high ISO very well with less noise than crop sensor cameras. If you’re looking for camera settings for astrophotography, please be sure to check out my astrophotography cheat sheet in the blog section.
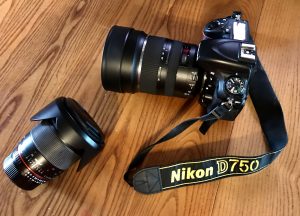 As far as the lens I use for astrophotography I have two currently in my bag. The Rokinon 24mm f/1.4 and the Tamron 15-30mm f/2.8 lens. They’re both incredibly sharp lenses and I would recommend them to any of my photography friends. When it comes to night skies photography these two lenses are some of the the best on the market. The lenses are sharp and have very little or no coma which is critical to good astrophotography. The Rokinon is considered an entry level astrophotography lens as it’s all manual. Nothing automatic at all with this lens, but don’t let the price or the fact the lens is considered entry level fool you. The photos this lens is capable of taking are far from entry level. The Tamron 15-30mm lens is the newest addition to my camera bag. I got this lens for its wide angle abilities for those times I need to capture large areas of the night sky. This lens is more expensive as it has many more capabilities. I’ve used this lens for night skies and storm chasing photography and I’m very impressed with the sharpness.
Focusing
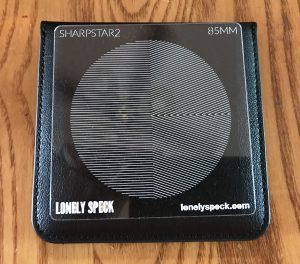
Focusing at night can be challenging. One tool that I use on the Rokinon 24mm lens is the SharpStar 2 from Lonely Speck. In astronomy, it’s also known as a Bahtinov Mask. SharpStar uses the properties of optical diffraction to create a set of three fine spike lines around a bright star. These diffraction spikes will shift position as you focus your camera. Adjusting focus so the central diffraction spike sits evenly between the other two diffraction spikes will ensure perfect focus. Once you’ve verified the focus pattern on your test shot, you can simply remove the SharpStar and shoot like normal, knowing that you have perfect focus.
Memory Cards
Many nights I end up taking many photos for star trails, time lapses, and stacking of Milky Way photos. Make sure your camera has plenty of space on those SD cards. Its also not a bad idea to have a spare card or two in case you run into a problem.
Remote Trigger
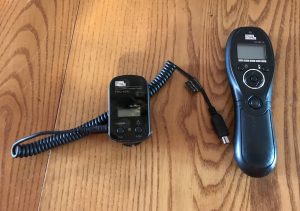 When shooting individual shots of the Milky Way I use a remote trigger to take the photos. I do this to avoid touching the camera and introducing unnecessary shake which will ruin the image. The trigger I use (Pixel TW-282RX) is a little older because I originally got it for my Nikon D3100 camera. The 3100 does not have an interval timer and this trigger can be used as the interval timer. The Pixel TW-282RX is no longer available but plenty of other varieties of remote triggers are on the market. And if you plan on doing night skies photography, you should have one.
Hand Warmers

Hand warmers can be used for more than just warming up your hands. They’re also great for keeping condensation off the camera lens at night. You’ll run into condensation on almost any night you shoot if you shoot more than 30 to 45 minutes. I take two of the hand warmers and, using a rubber band, place the warmers at the end of the lens. In many cases the warmers will keep condensation off the glass for the entire night if needed.
Batteries
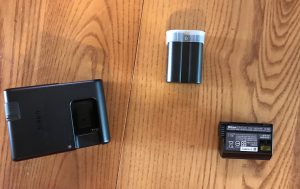 If you plan on shooting for a long time make sure your batteries are fully charged and that you have several of them. If at all possible, purchase a battery grip pack that attaches to your camera. This way you can go most of the night on multiple batteries without changing them. If you have a limited amount of batteries consider purchasing a DC inverter for your car to charge batteries.
LLL Lighting
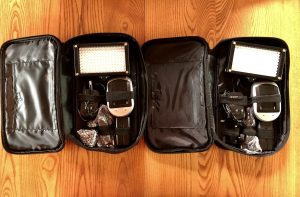 Many times I need to cast soft light on my foreground object in my astrophotography photo so details can be seen. The LED light panels I have do this very well. I’ll typically place the LED panels a fair distance away from the foreground subject and use gorilla pods or some other means to secure the lights so they are stationary. I then finish setting up for my photo shoot making sure the composition is correct and the foreground subject is lighted the way I want.
LLL or low level lighting has become very popular with astrophotographers over the past couple of years because the light is cast more evenly on the foreground subject. Painting with a flashlight can result in uneven light painting and can lead to the foreground object being blown out in the exposure. Also several national parks have banned light painting with flashlights, but they allow for the use of LLL lighting techniques. Right now I own two Vidpro Varicolor 144-Bulb LED light kits. In many cases this is enough to do the job but sometimes I do a photo shoot wishing I had a third. Sometime in the future I will likely get a third LED panel. These particular panels are nice because they have variable brightness control from 10% to 100% power and the panels have variable temperature control.
Miscellaneous Lights
Even though I don’t use it often I always have a flashlight with me in case I want to send a beam of light into the sky. That’s fun with Milky 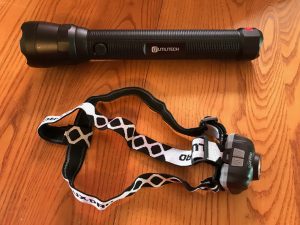 Way photography. I do, however, always use the LED light I wear on my head. Its how I get around safely at night. Plus it has several light options including a red LED light that I can use to see where I’m going, but its not bright enough to bother people much if I’m out and about with other folks.
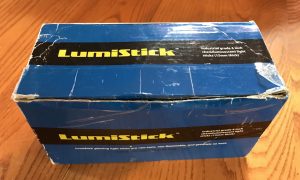
On this trip I’m also taking my LumiStick glow sticks with me. Not sure if I’ll use them, but they can add color to buildings or near by objects which can make a photo more interesting.
All of the items I’ve listed in this post come with me on most every night skies photography trip. I also take some other basic items such as my tripod, bug spray, chair, snacks, drinks, and a sleeping bag in case I want to catch a few zzz’s.
Thats all for now. Be sure to check my Gallery for photos from this upcoming trip.
© Willard Sharp