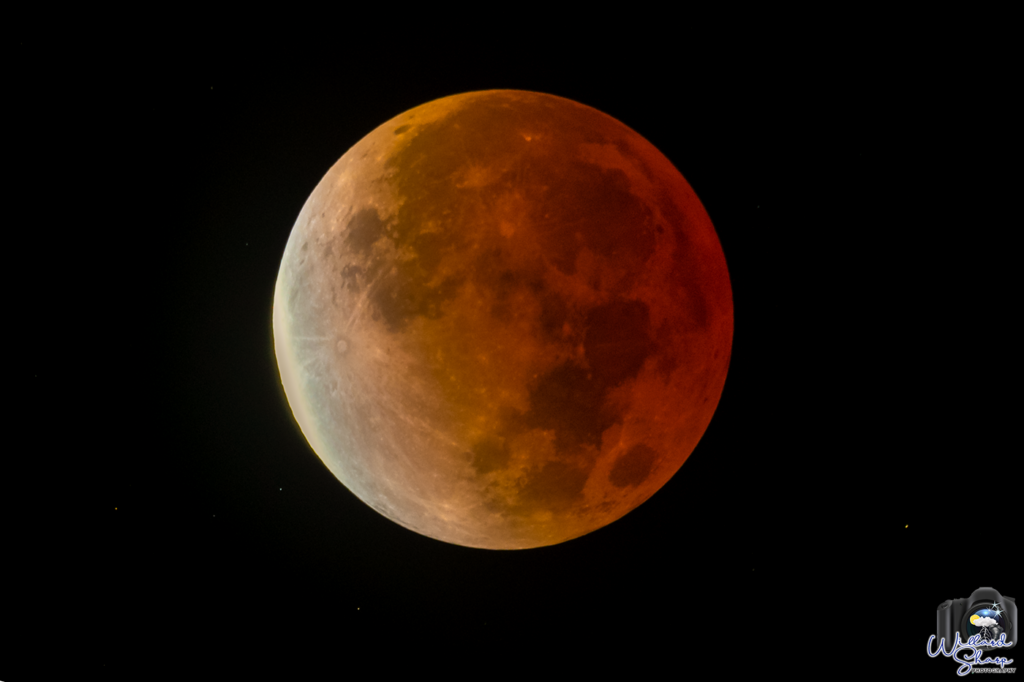
The August 27, 2026 lunar eclipse is almost here, and it should provide an excellent opportunity for photographers across Iowa and much of the United States.
While this event is technically a partial lunar eclipse, nearly 96% of the Moon will pass into Earth’s darkest shadow. That means photographers may have the opportunity to capture a dramatically darkened Moon with the deep red, orange and copper colors often associated with a “blood moon.”
The biggest challenge from a photography perspective? The Moon’s brightness will change dramatically throughout the night.
A camera setting that works perfectly before the eclipse begins will likely be completely wrong near maximum eclipse. Knowing how to adjust your exposure, focus and composition as the Moon moves through Earth’s shadow can make the difference between a disappointing image and one you’ll be excited to share or print.
In this guide, I’ll cover my recommended lunar eclipse camera settings, lenses, focusing techniques and photography tips for capturing the lunar eclipse.
Whether you’re using a professional mirrorless camera, DSLR or even a smartphone, a little preparation before the eclipse will go a long way.
When Is the August 27, 2026 Lunar Eclipse?
For photographers in central Iowa, the eclipse will take place on the evening of Thursday, August 27, and continue into the early morning hours of August 28.
Here is the approximate eclipse timeline:
| Eclipse Phase | Approximate Time (CDT) |
|---|---|
| Penumbral eclipse begins | 8:23 PM |
| Partial eclipse begins | 9:33 PM |
| Maximum eclipse | 11:12 PM |
| Partial eclipse ends | 12:51 AM |
| Penumbral eclipse ends | 2:01 AM |
The most dramatic photography opportunities should occur as the Moon moves deeper into Earth’s shadow, especially during the period surrounding maximum eclipse at approximately 11:12 PM CDT.
Exact viewing conditions, Moon position and timing can vary slightly depending on your location, so I always recommend confirming the details for your specific shooting location before heading out.
Where Will the Moon Be?
For photographers in the Midwest the Moon will be positioned generally toward the southeast during the eclipse. At maximum eclipse, the Moon will be roughly 31 degrees above the horizon. That is high enough that you won’t need a perfectly unobstructed horizon, but it still gives photographers opportunities to work foreground elements into wider compositions.
Before eclipse night, take some time to scout your location.
Look for:
- An unobstructed view toward the east and southeast
- Interesting trees or silhouettes
- Barns and rural landscapes
- City skylines
- Lakes or other reflective water
- Open landscapes
- Locations with minimal light pollution
Why the August 27 Lunar Eclipse Is Special
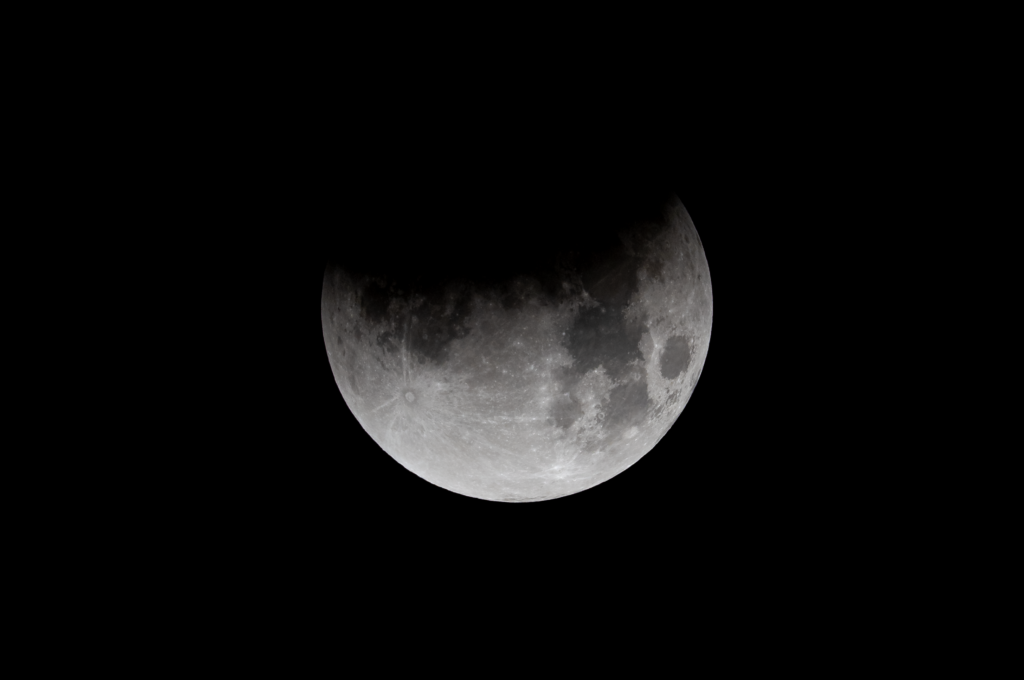
This event is technically a partial lunar eclipse, but it will come very close to being total. Approximately 96% of the Moon’s disk will enter Earth’s umbral shadow at maximum eclipse. Only a small portion of the Moon will remain outside the darkest part of Earth’s shadow. For photographers, this can create a particularly interesting scene. During the early stages, the Moon will still look much like a normal full Moon. As Earth’s shadow advances, however, part of the lunar surface will become increasingly dark.
Near maximum eclipse, much of the Moon may take on shades of:
- Deep red
- Orange
- Copper
- Brown
The exact appearance depends on atmospheric conditions and how sunlight is filtered and bent through Earth’s atmosphere.
This changing brightness is also what makes lunar eclipse photography challenging. You’ll need to adjust your camera settings as the eclipse progresses.
What Camera Gear Do You Need to Photograph a Lunar Eclipse?
You don’t need a specialized observatory or expensive astrophotography telescope to photograph a lunar eclipse. A basic camera and sturdy tripod can produce excellent results.
My recommended gear includes:
- DSLR or mirrorless camera
- Telephoto lens > 300mm for best results
- Sturdy tripod
- Remote shutter release
- Extra batteries
- Headlamp or flashlight
- Lens cloth
- Wide-angle lens for landscape photographs
- A dew heater or hand warmers at the end of the lens to prevent condensation
An optional tracking mount can also be useful, but it isn’t required.
The most important pieces of equipment are a camera capable of manual exposure control, a reasonably long lens and a stable tripod.
Best Lenses for Lunar Eclipse Photography
The lens you choose depends on the type of photograph you want to create.
200–300mm
A 200–300mm lens works well for:
- Moon and landscape compositions
- Including surrounding stars
- Showing the Moon above buildings or trees
The Moon won’t fill the frame, but this focal length gives you flexibility.
400–600mm
This is my preferred range for detailed Moon photographs.
A 400mm, 500mm or 600mm lens allows you to capture significantly more lunar detail while still maintaining a practical field of view.
This range is excellent for:
- Close-up lunar photography
- Eclipse progression photographs
- Capturing the advancing shadow
- Detailed photographs near maximum eclipse
600mm and Longer
Longer focal lengths can create dramatic close-up photographs of the Moon.
However, they also make everything more difficult.
At very long focal lengths:
- Camera vibration becomes more noticeable requiring faster shutter speeds
- Accurate focus becomes more important
- The Moon moves through the frame more quickly
- Atmospheric distortion can affect image quality
A high-resolution camera can also allow you to shoot at a slightly shorter focal length and crop later.
Best Camera Settings for the August 27 Lunar Eclipse
There is no single perfect setting for photographing an entire lunar eclipse. The Moon will become progressively darker as it enters Earth’s shadow. That means your exposure settings will need to change. I recommend shooting in Manual mode and making adjustments as conditions change. Also, shoot in RAW if your camera supports it. RAW files provide considerably more flexibility during editing.
Starting Camera Settings for a Bright Full Moon
Before the eclipse significantly darkens the Moon, start with approximately:
- Mode: Manual
- Aperture: f/8 to f/11
- ISO: 100–200
- Shutter Speed: 1/125 to 1/500 second
- Focus: Auto
- File Format: RAW
- White Balance: Daylight or approximately 4500K–5500K
The full Moon is much brighter than many people realize. This also makes auto focus a viable option as it easy for the auto focus to lock on.
Don’t let your camera meter for the dark sky and overexpose the Moon.
The goal is to preserve detail in the lunar surface.
Take a test photograph and zoom into it on the back of your camera.
If the Moon looks like a featureless white circle, reduce your exposure.
Don’t use your finger to take the shoot. Touching the camera always introduced shake and especially as the moon gets darker you don’t want shake. Use a remote shutter to take the shot. If you don’t have a remote shutter or trigger use the built in interval timer in camera to take all the shots and stop occasionally to check the photos.
Camera Settings During the Partial Eclipse
As Earth’s shadow begins covering the Moon, you’ll need to gradually increase exposure.
Try starting around:
- Aperture: f/7.1 to f/10
- ISO: 200–800
- Shutter Speed: 1/30 to 1/125 second
Continue checking your images as the eclipse progresses. Refocus occasionally as temperature changes in the lens will change the focus.
The Moon’s brightness can change quickly enough that you may need to adjust settings several times during the night.
Camera Settings Near Maximum Eclipse
Near maximum eclipse, most of the Moon will be inside Earth’s shadow.
This is where the exposure difference becomes significant.
A useful starting point might be:
- Aperture: f/5.6 to f/7.1
- ISO: 800–3200
- Shutter Speed: 1/2 to 1/30 second
- Focus: You might need to change to manual focus here but try auto first to see if it works.
These are only starting points. Take time to adjust your settings if needed for an optimal photo.
Your exact settings will depend on:
- Your lens
- Your camera
- Atmospheric conditions
- The Moon’s brightness
- The amount of lunar surface still illuminated
- How much motion blur you are willing to accept
At long focal lengths, I generally prefer increasing ISO rather than using an excessively long shutter speed.
For example, I would often rather try:
1/4 second at ISO 3200
rather than:
2 seconds at ISO 400
The longer exposure begins to soften the Moon due to its movement. My experience is to stay below 1/2 second. Increase ISO to capture a clean image and in post processing the noise can be removed.
Lunar Eclipse Camera Settings Cheat Sheet
| Eclipse Stage | Aperture | ISO | Starting Shutter Speed |
| Bright full Moon | f/8–f/11 | 100–200 | 1/125–1/500 sec |
| Early partial eclipse | f/7.1–f/10 | 200–400 | 1/60–1/250 sec |
| Deep partial eclipse | f/5.6–f/7.1 | 400–1600 | 1/15–1/125 sec |
| Near maximum eclipse | f/4–f/5.6 | 800–3200 | 1/2–1/30 sec |
| Very dark Moon | f/4–f/5.6 | 1600–6400 | Adjust as needed |
Important: Use these as starting points rather than exact settings.
Check your images and histogram regularly.
Shoot the Lunar Eclipse in RAW
If you’re serious about getting the best possible photograph, shoot in RAW.
A lunar eclipse presents a wide range of brightness levels.
RAW files give you more flexibility to adjust:
- Highlights
- Shadows
- Exposure
- White balance
- Noise
- Contrast
- Color
- Sharpening
This is particularly useful near maximum eclipse when the Moon may become significantly darker and higher ISO settings may be required.
For me, this is one of those events where I want as much information as possible available when I begin editing.
You can always create a JPEG later.
You can’t go back and capture additional RAW data after the eclipse is over.
How to Focus Your Camera on the Moon
Focusing is one of the most important parts of lunar eclipse photography.
I recommend establishing focus before the Moon becomes dark.
Here’s my basic process:
-
- Set the camera on the tripod.
- Switch to auto focus.
- Use Live View.
- Zoom in on the Moon as much as your camera allows.
- Allow the autofocus to focus in on the moon.
- Carefully adjust focus until lunar detail appears sharp.
- Take a test image.
- Review the image at high magnification. You should see craters and such on the surface.
- Make small adjustments if necessary.
Once you’ve established critical focus, flip to manual and be careful not to bump the focus ring. I use gaffers tape on the focus ring to hold it in place.
Use a Sturdy Tripod for Sharp Lunar Eclipse Photos
You may be using shutter speeds of 1/500 second while the Moon is bright.
Later in the eclipse, you could be shooting at 1/15, 1/4 or even longer.
A sturdy tripod becomes increasingly important.
To reduce vibration:
- Use a solid tripod
- Use a remote shutter release when possible
- Use your camera’s 2-second timer if you don’t have a remote or the cameras internal intervalometer
- Avoid touching the camera during exposure
- Consider electronic front-curtain shutter if your camera supports it
- Check your camera and lens recommendations for image stabilization when mounted on a tripod
- Disable all camera vibration controls. You don’t need it on a tripod.
Also remember that a tripod won’t stop the Moon itself from moving.
At long focal lengths, a shutter speed that is too slow can cause the Moon to soften because of its movement across the sky.
Photograph the Entire Eclipse Progression
One of my favorite lunar eclipse photography techniques is capturing more than one photograph.
Instead of focusing only on maximum eclipse, photograph the Moon throughout the event.
Capture images:
- Before the eclipse
- During the early partial phase
- As Earth’s shadow advances
- Near maximum eclipse
- After maximum eclipse
- As the Moon gradually returns to normal
Later, you can combine selected images into an eclipse progression composite.
A sequence of the Moon moving through Earth’s shadow can tell the story of the entire event in a single image.
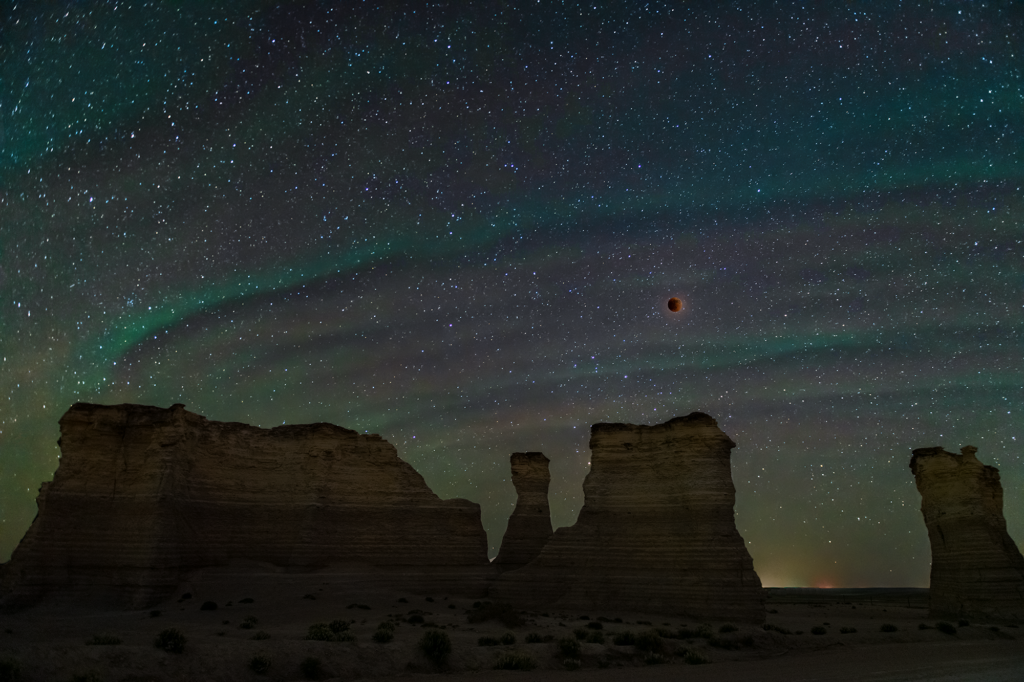
Try a Wide-Angle Lunar Eclipse Photograph
Don’t spend the entire night shooting at 600mm. My 2nd camera will be busy as well this night.
Some of the most memorable photographs of a lunar eclipse include the environment around the Moon.
Take time to switch to a wider lens.
Look for compositions that include:
- Farmland
- Barns
- Trees
- Lakes
- City skylines
- Buildings
- Silhouettes
- Other photographers
- Stars
A close-up photograph shows the details of the Moon.
A wide-angle image can tell the story of where you were when you photographed it.
The location can be just as important as the subject. I have a fantastic foreground picked out for my lunar eclipse shoot. I can’t wait to show everyone!
Photograph the Stars During the Eclipse
During the early stages, the bright Moon can overwhelm much of the surrounding night sky.
As the Moon becomes darker, more stars may become visible.
This creates an opportunity to experiment with wider compositions.
Try using a wide-angle lens and photographing the eclipse within the larger night sky.
You’ll need completely different settings than you would for a close-up Moon photograph.
For a wide-field image, experiment with:
- Wider apertures
- Higher ISO settings
- Longer exposures
- A stable tripod
Just remember that your goal is different.
When photographing a close-up Moon, you are trying to preserve fine lunar detail.
When photographing the Moon and stars together, you’re balancing the exposure between two very different subjects.
Experiment.
Take multiple exposures.
Review the results.
How to Photograph the Lunar Eclipse With a Smartphone
You don’t need a professional camera to photograph the August 27 lunar eclipse.
Modern smartphones can capture surprisingly good images when used properly.
My recommendations:
- Use a tripod or stable support
- Turn off the flash
- Use optical zoom when available
- Avoid excessive digital zoom
- Tap the Moon to establish focus
- Reduce exposure if the Moon is too bright
- Use a timer to avoid shaking the phone
- Take multiple photographs
A smartphone won’t generally capture the same level of detailed lunar surface information as a camera with a 600mm lens.
But that’s okay.
Think about composition.
Try photographing the Moon above an interesting landscape, building or silhouette.
Some of the best smartphone photographs don’t depend on extreme magnification.
My Recommended Lunar Eclipse Photography Workflow
Here’s how I would approach photographing the eclipse.
Before Heading Out
Check:
- Weather forecast
- Cloud cover
- Smoke forecast
- Camera batteries
- Memory cards
- Moon position
- Shooting location
Make sure everything is packed before you leave.
There is nothing worse than arriving at your location and realizing your camera battery is sitting at home.
Before the Eclipse Begins
Arrive early.
Set up your tripod.
Take several test photographs of the full Moon.
Establish critical focus.
Test different exposures.
Check your histogram.
Penumbral Eclipse Begins
The initial change may be subtle.
Use this time to make sure everything is working correctly.
Check your framing and focus.
Partial Eclipse Begins
Start photographing the progression.
As Earth’s shadow moves across the Moon, gradually adjust your exposure.
Don’t wait until maximum eclipse to begin experimenting.
Approaching Maximum Eclipse
This is when I would be actively checking every image.
Try:
- Different shutter speeds
- Higher ISO settings
- Different focal lengths
- Exposure bracketing
- Wide-angle compositions
Maximum Eclipse
For photographers in the Midwest, maximum eclipse is expected at approximately 11:12 PM CDT.
This is the time to concentrate on the dramatic darkened Moon.
Try your detailed telephoto images.
Then step back and try something wider.
If you have an interesting foreground, this is the time to experiment.
After Maximum Eclipse
Don’t pack up immediately.
Continue photographing as the Moon gradually moves out of Earth’s shadow.
The second half of the eclipse gives you another opportunity to capture the changing lunar surface.
My Most Important Lunar Eclipse Photography Tip
Don’t watch the entire eclipse through your camera.
It’s easy to become so focused on camera settings that you forget to actually experience what you’re photographing. Take your pictures. Check your focus. Check your exposure. Make adjustments. Then step away from the camera for a moment. Look up. Enjoy it.
Photography is about capturing moments, but sometimes the most important part of the experience is simply being there.
Final Lunar Eclipse Photography Checklist
Before you leave, make sure you have:
☐ Camera
☐ Telephoto lens
☐ Wide-angle lens
☐ Sturdy tripod
☐ Extra batteries
☐ Charged batteries
☐ Extra memory cards
☐ Remote shutter release
☐ Headlamp or flashlight
☐ Lens cloth
☐ RAW enabled
☐ Manual exposure ready
☐ Manual focus tested
☐ Weather forecast checked
☐ Shooting location selected
Good luck, clear skies and happy shooting!
— Willard Sharp
Willard Sharp Photography