In last week’s blog I covered the core equipment I settled on for my deep sky astrophotography journey. The main components include the camera, tracking mount, guide camera, and the computer controller that controls the tracking of the camera and locating the celestial objects in the sky. Today’s blog includes the hardware needed to connect and power everything, as well as the first telescope I chose.
Telescope
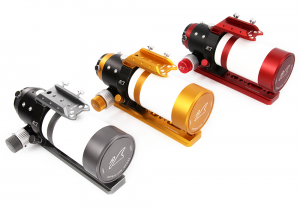
If you’re just starting out in deep sky astrophotography and have a telephoto lens, you can use that lens to start. However, at some point you’ll want to look for that first telescope to connect to your camera. There are tons of telescopes in all shapes and sizes to choose from. Part of your telescope decision will be based on what type of deep sky astrophotography you’re going to do. In my case, I’m interested in nebula and galaxies. Depending on what specific object you photograph you’ll want to shoot in the 200 to 800mm range or what’s called wide angle deep sky photography. After doing research I settled on the William Opticsw ZenithStar 61Doublet Refracting Telescope. The scope has a focal length of 360mm and great optics to take spectacular photos of deep sky objects. The cost of the telescope won’t break the bank so its a logical choice for a first telescope.
Field Flattener
Telescope Accessories
When you purchase a telescope the next things you’ll need will be the ability to mount the scope to your camera. To do this you’ll
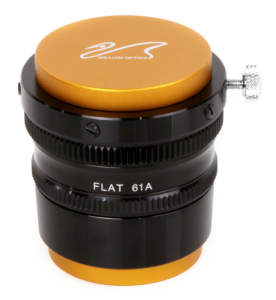
need an adapter called a T Ring to connect the telescope to your camera. My cameras are all Nikon so I purchased the William Optics 48mm T-Adapter for my camera. T-Adapters will vary depending on your camera type so do research before you purchase one. Another important component for connecting the telescope to the camera is a field flattener. A flattener will remove distortion created by the telescope when sending light to the camera sensor. Flatteners are not the same so when you look at different telescopes you’ll need to order a flattener that is designed to work with the specific telescope you purchase. In my case I ordered the William Optics Z61 Adjustable Flattener. This flattener connects the ZenithStat 61 telescope to the T-Ring, which then connects to my Nikon camera.
Mounting Options
Dove Tail
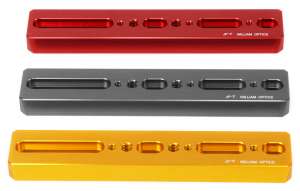
There are many options for mounting telescopes to your tracking mount. The ZenithStar comes with a dove tail already connected to the telescope. You’ll use that to connect the telescope and camera to the tracking mount. Many telescopes come with the dove tail. However, in some cases you’ll need to purchase a separate dove tail bar. This is true if you’re looking to use a telephoto lens for taking photos. I purchased the DSD 210 Plate to mount my Tamron 150-600mm lens and camera to the tracking mount. You’ll also need to look at mounting options for your guide scope if your going to be using a telephoto lens. I opted for a Nikon compatible L-bracket and an arca-type clamp that connects the guide scope to the L bracket.
Power
EH-5A 12V-24V
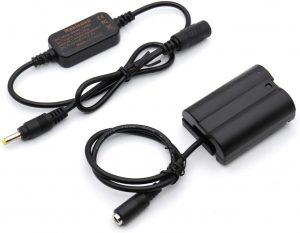
As you’re collecting accessories for your deep sky astrophotography setup you’re going to need power to run the ASIAir computer, tracking mount, and camera. In order to connect my accessories the way I want, I ordered additional power components. The HEQ5 tracker and my Nikon camera are powered by the ASIAir via DC power. The ASIAir has 4 DC outputs for accessories. To ensure adequate power to the ASIAir I purchased a separate power brick so the ASIAir will always have reliable power. I connect everything to a Jackery Portable Power Station. While at home I connect the Jackery power station to AC power to ensure I have power all night long. If I take my setup on the road the Jackery power station I have will run my setup for around 4 hours.
UpBright 12V AC Adapter for SkyWatcher AZ
Nikon EH-5A 12V-24V Adapter Step-Down DC Cable
Jackery Portable Power Station
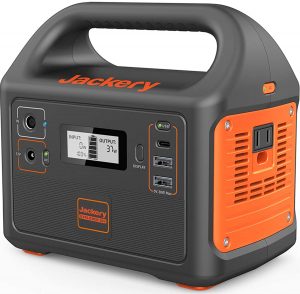
Jackery Portable Power Station
Final Thoughts
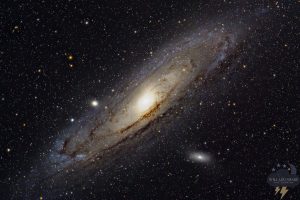
Andromeda Galaxy
I’ve thrown a bunch of information at you in these past couple of blogs. Getting into deep sky astrophotography can seem daunting at first but with patience you’ll learn to swim quickly. Another area worthy of a long discussion that I haven’t covered yet is filters. Many filters exist that perform different tasks when taking deep sky photos. It’s an area that I’m still learning about. Right now I’m using the Optolong L-eNhance filter to filter out light pollution and get stronger detail in my nebula shots. One day when I’ve used this and other filters more I’ll write a blog about those experiences.
I hope you’ve found my last couple of blogs informative. As you start you’re own deep sky astrophotography journey tell me about some of your experiences in the comment section. Until then have a great week and keep on shooting!