The solar eclipse that will move across the US on August 21 is a month away. Are you ready to view and photograph this rare spectacle? I know that I’m ready!
Photographing the eclipse is not as complicated as you might think. Through the course of this article, I’ll explain the process of creating your own solar filter, discuss the camera equipment needed, and talk about focal length, camera settings, and composing your shot.
Safety First!
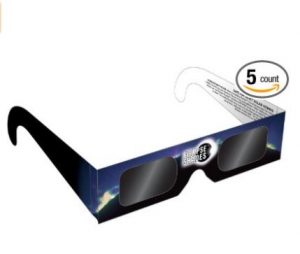
Solar Eclipse Glasses.
Do not look at the sun with your naked eyes. Permanent damage to your eyesight, and even blindness, may result. Always wear certified solar viewing glasses when viewing the sun before, during, and after an eclipse. The solar glasses I’ve chosen can be ordered from Amazon as a 5 pack. Prolonged unprotected exposure causes permanent damage to your eyes. During an eclipse, when the moon covers a portion of the sun, the intensity of the light remains constant. The ONLY time it is safe to look toward the sun with the naked eye is during the brief period of totality at the height of a total eclipse of the sun.
Do not point a camera at the sun unless the optics are fitted with a solar filter. Optics can magnify the intensity and brightness of sunlight, and this can cause damage to your equipment.
Do not look through the viewfinder of an unfiltered SLR camera when it is pointed at or near the sun because of the increase in intensity and brightness of the sunlight passing through magnifying optics.
Do not point an unfiltered digital camera at the sun and use live view or an electronic viewfinder, due to the possibility of focusing concentrated, unfiltered sunlight at your camera’s sensor.
Enjoy the Eclipse!
A solar eclipse is not an everyday event. Some people will go their entire lives without witnessing one. Some will travel far and wide to try to see one or more in a lifetime. Total solar eclipses are rare.
So, what you don’t want to do is spend an entire eclipse event messing around with your camera gear, or viewing it entirely through a camera’s viewfinder or on an LCD screen.
Look at the eclipse. Enjoy it with your own (protected) eyes. As amazing as it would be to get a great photograph, I promise you that you will have a lifetime of regrets if you miss the whole show because you are hyper-focused on photographing the event. Besides, I’ve been told it looks much more amazing to the eyes than it does to the camera.
Now lets build a solar filter!
The DIY Solar Filter
The main thing to remember is that during the partial phase of the eclipse if you’re going to take pictures of it, you must have a solar filter on your camera lens. A solar filter will prevent damage to your camera and most importantly to your eyes if you happen to look through the view finder as your’re setting your camera up. Solar filters typically attenuate the sun’s visible and infrared energy by a factor of 100,000. A ND filter, no matter how many stops it has, will not work when photographing the eclipse. The ND filter does not filter out all the bandwidth or wave lengths from the light that comes from the sun. So you can still end up damaging your camera with an ND filter. Plus the photos will not look nearly as good. A solar filter is a must.
You can order solar filters that will screw on to the end of your camera, but they tend to be a little spendy. If you’re only going to photograph the eclipse and not take pictures of the sun after the eclipse, then a manufactured lens solar filter is not the way to go. For a few dollars you can order solar filter paper off of Amazon or other astronomy sites and construct your own DIY filter.
What you’ll need to make a DIY solar filter.
- Solar paper – I ordered an 8″ x 8″ piece of solar paper from Amazon for just under $20. Here’s the link to the paper.
- Cardboard
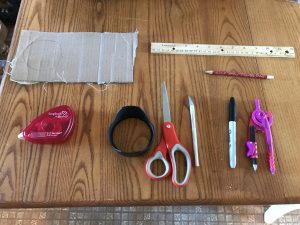
- Scissors and/or an Exacto knife.
- Double sided tape
- Compass
- Ruler
- Pencil
- Your lens hood
- Sharpie (optional)
Now that you have the materials, lets start the process of constructing the solar filter. First you’ll need to carefully measure the inside of your camera hood so you can insert the DIY filter inside the hood. The filter must fit snug inside the lens hood to prevent it from accidentally falling out or letting in sunlight around the edges. Note: If you want to take the very easy approach you can simply cut out a section of solar paper and, with rubber bands, wrap it around the end of your lens hood. This will work, however, I want to make a filter that is more durable and easy to remove during the totality phase of the eclipse so building a solar filter for the lens hood is a better way to go.
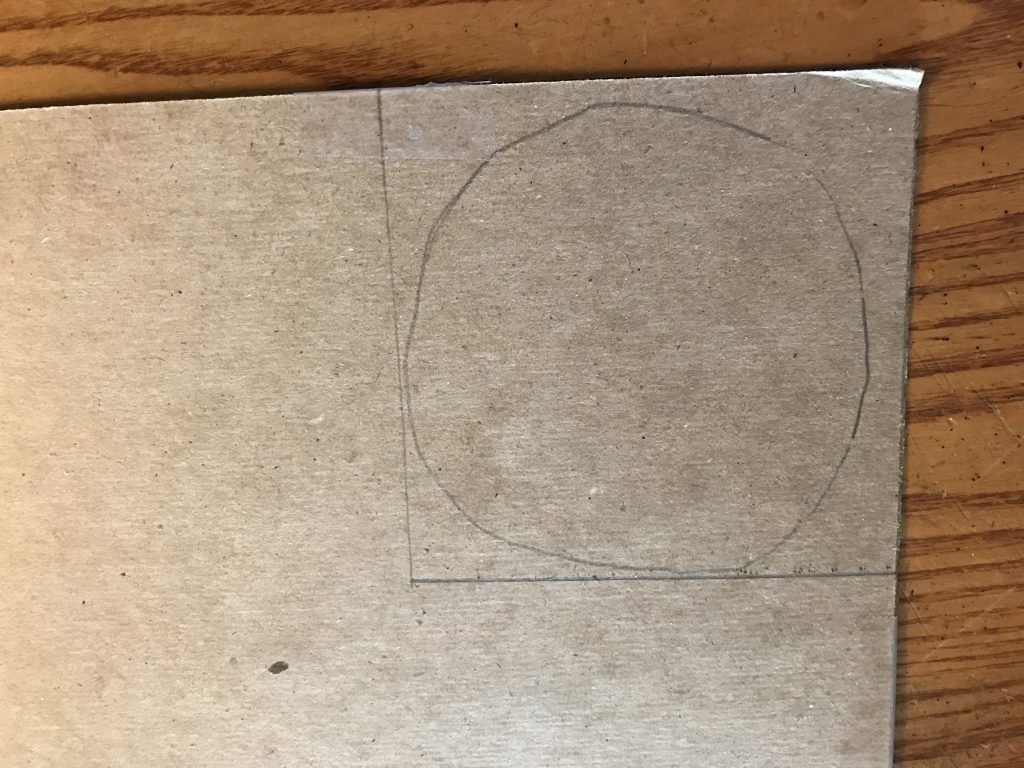
Once you have the inside diameter of the filter measured, take your compass and set it to the inside diameter of your lens hood. Draw a circle on the cardboard. Once the circle is drawn then draw another circle inside the outer one that is roughly 1/2 to 3/4 of an inch smaller than the diameter of the outer circle. You’ll end up with something like this.
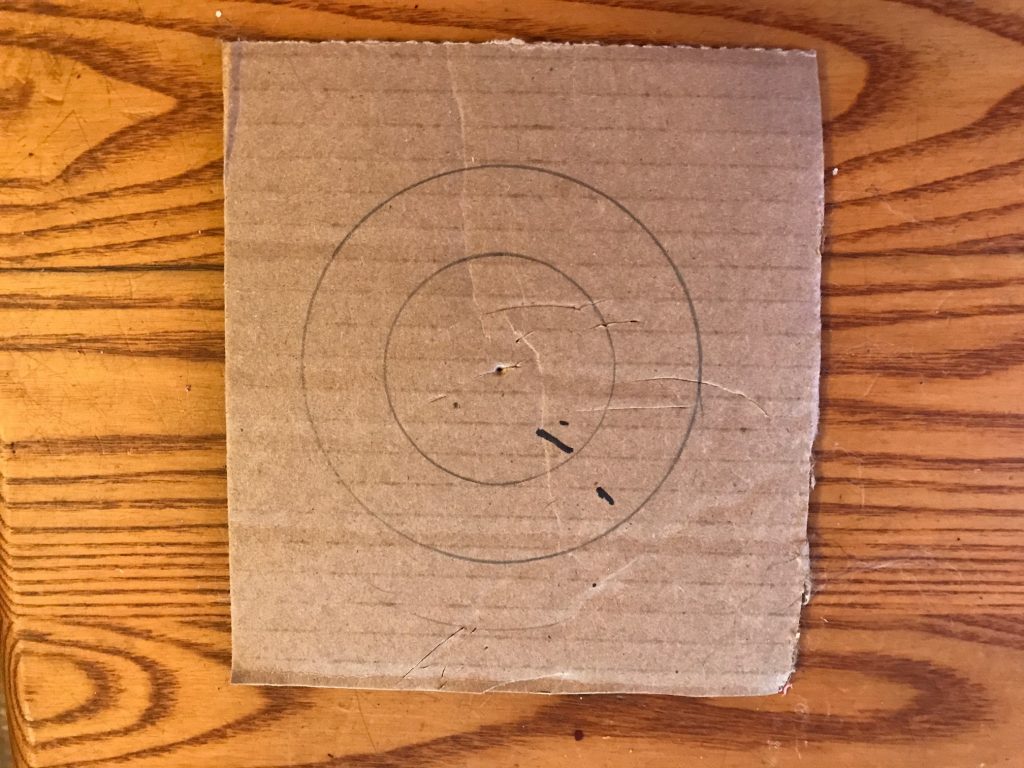
Now with your scissors cut the outer circle first. Once that is complete using the scissors or exacto knife cut along the line of the inner circle. Once done you’ll end up with this.
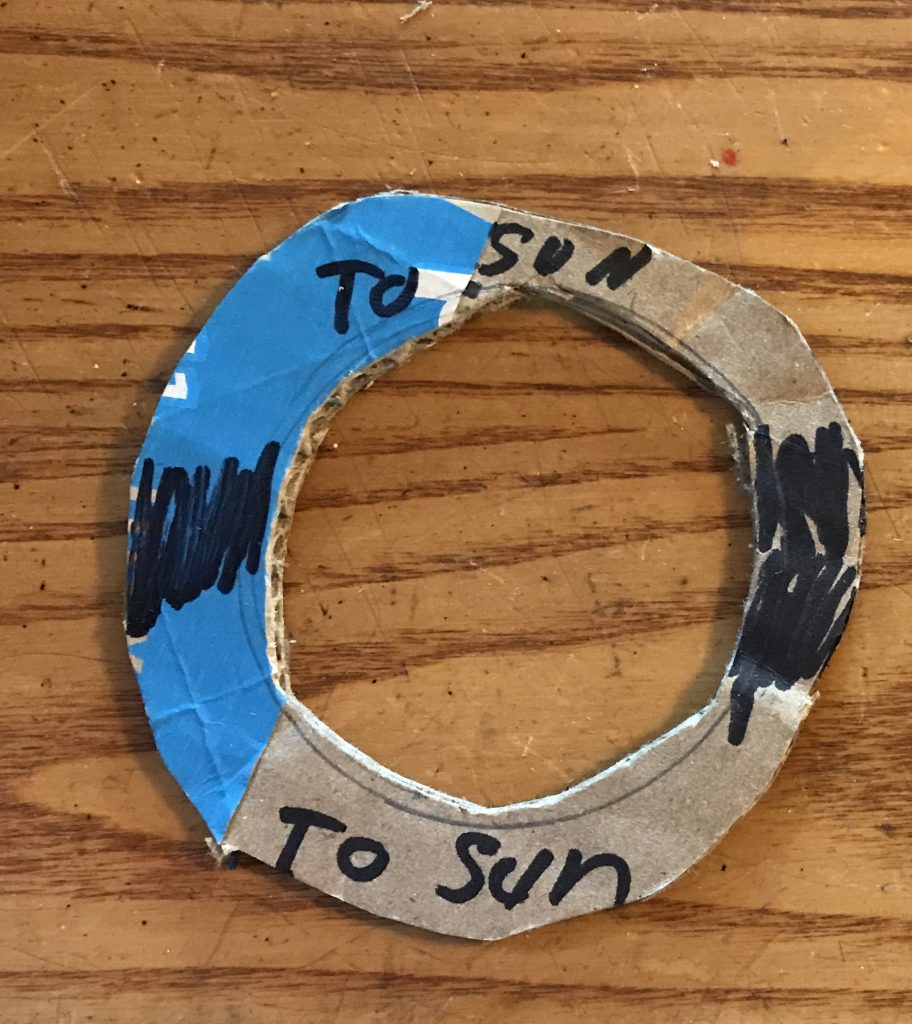
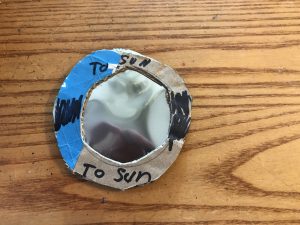
Yes I’ll be the first to admit my cutting was not perfect, but it will get the job done. Its important to know which part of the filter is facing the sun because one side if the solar paper must face the sun. So before moving on I marked the cardboard with To Sun. Do the writing before the filter is put together so you don’t risk writing on the solar paper itself. That will damage it.
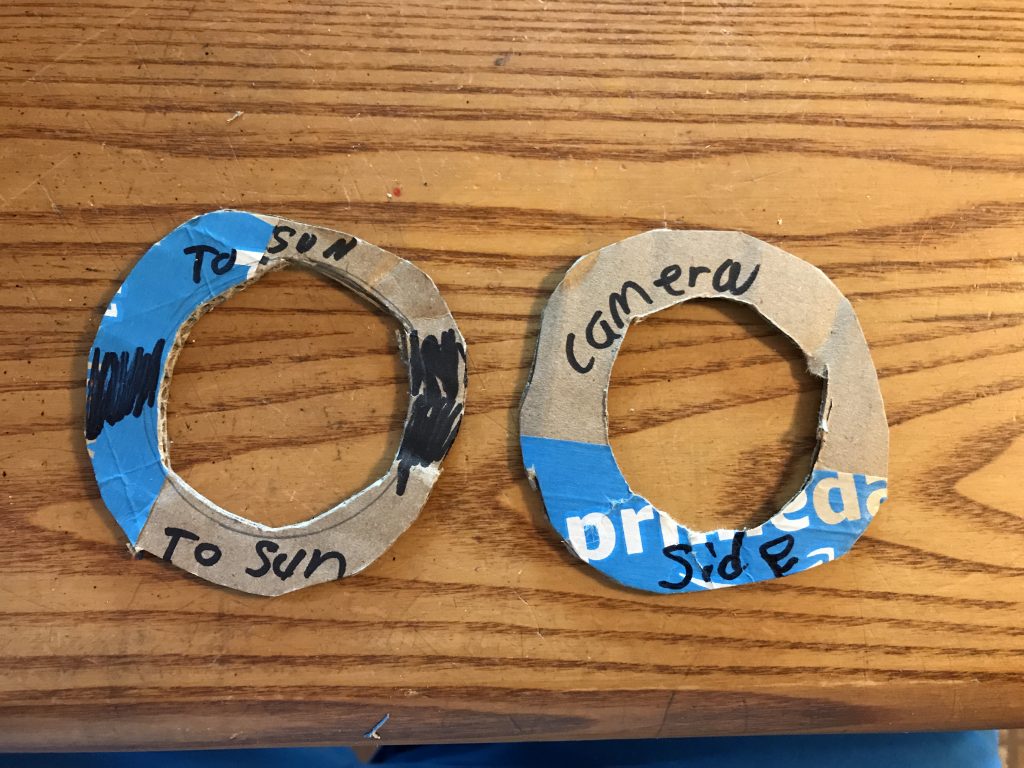
Next take your first cut out circle and use it to mark your cardboard so you can create the back side of the filter. After you’re done marking, cut out the circles. You’ll now have 2 cardboard circles. Mark the 2nd piece of cardboard camera side for reference.
Now its time to cut out the solar paper. The solar paper I ordered came in a cardboard sleeve. Leave the solar paper in the sleeve for this part. Take one of your cardboard circles and draw an outline of the larger circle on the cardboard that holds the solar paper. Then take your ruler and draw two straight lines just beyond the outer edge of the circles. The straight lines will be the lines you cut here in a moment.
Now take your scissors and cut along the straight lines you drew. You’ll cut a square out of the cardboard as well as the solar paper that is underneath. You will end up with this.
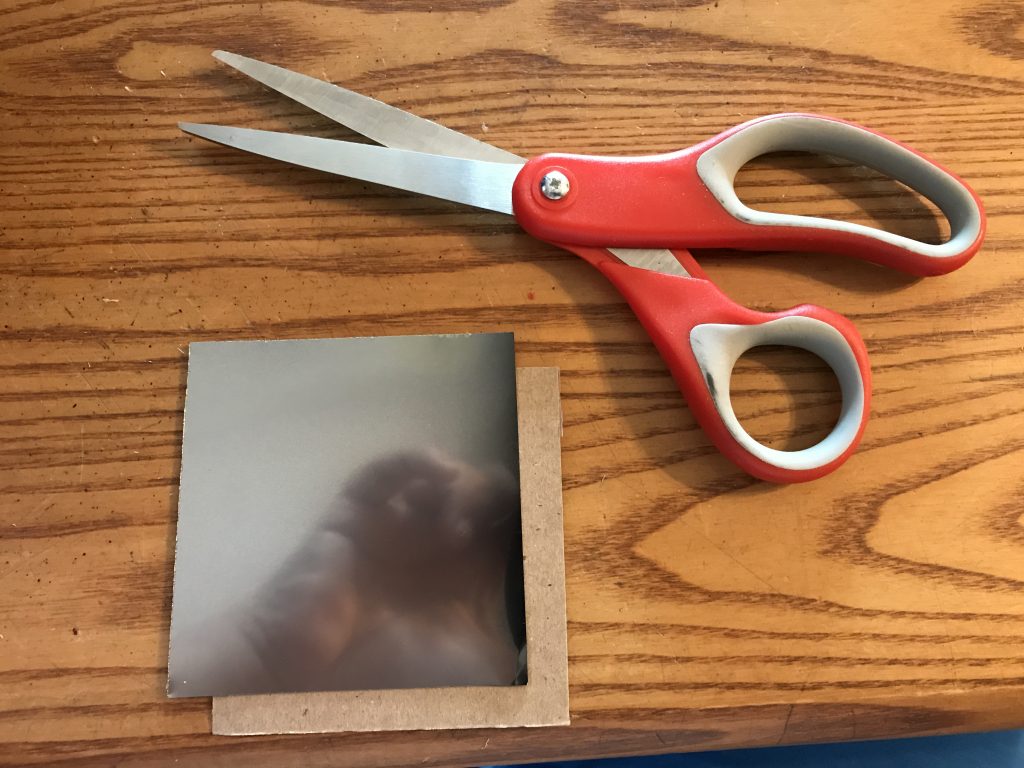
Carefully remove the solar paper square from your cut out cardboard. Next you’re going to attach this square to the cardboard rings we cut out earlier. With the solar paper I chose, the silver side of the paper must face the sun. The black side faces the camera. So when you attach the circles the one marked To Sun must be placed on the silver side of the paper.
Using your double sided thin tape, carefully cover one side of the sun facing cardboard ring with the tape. Then carefully place it on the silver side of the paper. Repeat this process for the back cardboard circle and attach it to the black side of the solar paper. Be sure to match up the circles when placing them together so they will fit into the lens hood correctly. Once this is complete take the scissors and carefully trim off the excess solar paper you’ll have on the outside of the ring. The final product will look like this. For extra security you can carefully tape around the outside edge of the cardboard.
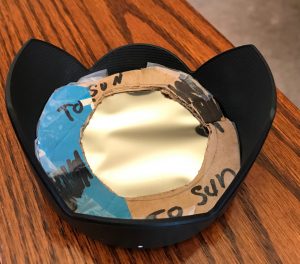
The entire process took me about 15 minutes. The filter in this example fits snug inside my Tamron lens hood. You probably noticed the filter paper has some wrinkles in it. That’s OK . Wrinkles will not impact the sunlight entering the lens. I’ve found the solar paper works fine if it’s near the glass of the lens or if it’s at the end of the lens hood. Remember you want this solution to fit snug in the lens hood so that light from the outer edge does not work its way in.
When Do I Use The DIY Solar Filter?
The solar filter is to be used ONLY during the partial phases of the solar eclipse. Even during the partial phase large amounts of sunlight are shinning down on Earth so you’ll need the filter in place to protect your camera and get the photos you’re looking for. During the totality phase of the eclipse, which lasts only for a couple of minutes depending on your location, you remove the filter. If you don’t remove the filter then your camera will miss the details seen at totality in the corona. With the DIY filter you’ve just constructed, the easiest way to remove it is to carefully remove your lens hood. Once totality is complete then put the hood and solar filter back to to continue photographing the eclipse.
Now lets continue on and discuss what gear is needed to photograph the eclipse and what camera settings should be used.
Basic Gear
- Eclipse Glasses – You’ll need these for a couple of reasons. a) You’ll want to view the eclipse with your own eyes and, b) you’ll need them to better aim your camera at the sun.
- DSLR Camera – You do not need a professional DSLR camera to photograph the eclipse. In fact, any camera will do, depending on how you want to capture the event. You just need to take the proper precautions to protect the camera (and your eyes).
- Tripod – During totality the exposure times on the camera will increase and a tripod becomes a requirement. Remember that if your lens has vibration control be sure to turn that off while the camera is on the tripod. Otherwise the sun will have a case of the shakes and wobbles! I recommend using the tripod through the duration of the eclipse.
- Remote Shutter Release – When it gets dark, your shutter speeds will fall and you’ll want to trigger your camera remotely with a cable release, electronic release, or mobile device to prevent camera shake and blurring of your images. If your camera supports multiple exposures using bracketing use that method.
- Solar Filter – This is a requirement during the partial phase of the eclipse.
- Lenses and focal length – The sun is rather small against the background of the sky. So keep in mind when photographing the sun that if you use a wide-angle lens, the sun is very small in your frame. With a standard-length telephoto lens, the sun is slightly larger, but not frame-filling. To fill your viewfinder, you will likely need to go well past a 300mm focal length lens.
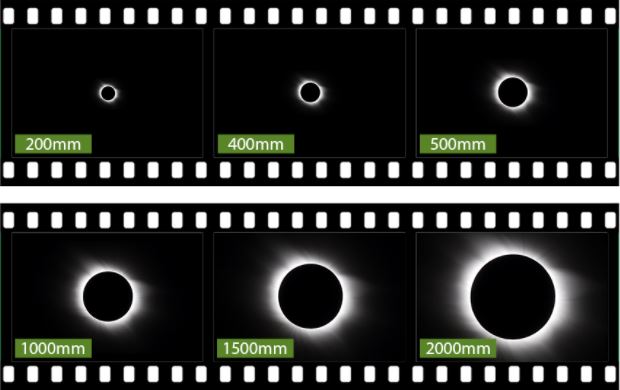
Image Courtesy of Google Images.
During the total eclipse of the sun, when the umbral shadow passes over the observer, the sun’s corona, usually invisible to the naked eye, is suddenly visible and it extends well away from the surface of the sun. So, an extreme telephoto lens may cause you to crop out significant portions of the corona. Keep this in mind when selecting a lens for an eclipse image. A focal length between 500mm and 1000mm will allow you to capture most of the corona while keeping the sun a good size in the frame.
Other Gear & Tips
- Do not use your flash. Even when it’s dark at totality.
- Remove screw on lens filters from the lens to insure no interference with the solar filter.
- Set high-speed continuous shooting for bracketing.
- Bracketing seven frames at two-stop intervals during totality (Practice this ahead of time!)
- Daylight white balance.
- Manual Focus by turning off Autofocus on the lens.
- Make sure your Date and Time are accurate.
- Turn off image stabilization on the lens, if you are using a solid tripod.
- Set the image quality to RAW.
- You should be using Live View during the eclipse so you won’t have to use mirror lockup.
- During partial phases you might consider using the interval timer.
- If you have it, turn on your LCD grid display so you’ll have a center mark to help center the sun throughout the eclipse.
- Bring extra batteries. Charge them the night before and bring at least one more than you think you need. How awful would it be to run out of power just before the show?
- Bring extra memory for the same reason. Pack a spare memory card in your bag that you can reach for if you took way more photos than you planned or if your card fails for some reason.
- If you do not have an accurate infinity hard stop on your lens, pre-focus your camera and lens at infinity and lock the focus, set the focus to manual, or use gaffer tape to keep it from changing, if you can. Use the view screen with the solar filter on to fine tune the focus until its sharp.
- Practice your solar photography days, weeks, months before the actual eclipse. Practice, practice, practice.
- Scout your location a day or two in advance to see the path the sun will take across the sky on the day of the eclipse. The sun will be approx 60° above the horizon so your camera will be aimed high.
- Make a checklist of the gear you need. Check it twice.
- Watch the weather forecast closely the days before the eclipse. Be prepared to change your target destination if clouds or rain are in the forecast.
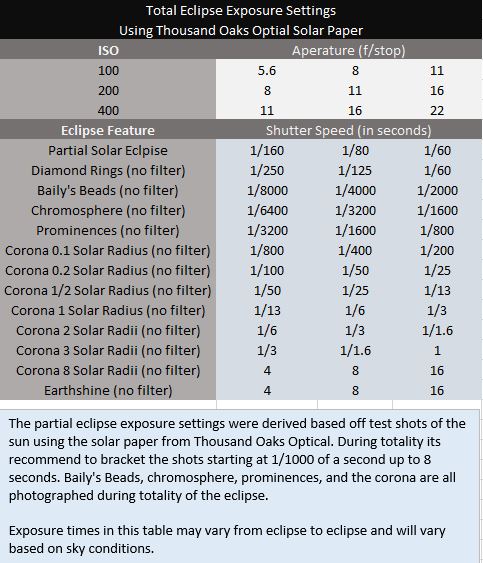
Camera Settings: Aperture, Shutter Speed, ISO and Bracketing
During the progression from direct sunlight to the height of a total solar eclipse, the light will quickly change from broad daylight to twilight-like darkness. The light really will not change dramatically until the eclipse approaches totality, so your camera settings can be static for a large portion of the event. The problem is that, when the eclipse show is at its most exciting, the light will be changing quickly, and you must be ready to adapt.
When the eclipse reaches totality and you have removed your solar filter from your camera, this is the time to start bracketing your shots heavily. Use the exposure guide below as just that, a guide for setting up your aperture, ISO, and shutter times. During totality bracket, bracket, and bracket some more. According to experts, there is a 12-stop dynamic range from the corona at the sun’s surface to the outer edges of the corona. Shoot a ton of shots at different exposures. When you post-process later, you can choose the one that looks best. But, during this rarest of events, do not just lock into one exposure and take a bunch of equally exposed images. The best strategy is to choose one aperture or f/number and bracket the exposures over a range of shutter speeds (i.e. – 1/1000 down to 5 seconds). Rehearsing this sequence is highly recommended since great excitement accompanies totality and there is little time to think. For the upcoming solar eclipse I’ll be running the camera at f/8 or f/9 and will maintain that aperture for the duration of the event.
The image below is a test shot I did with my solar filter and my Tamron 28-300 lens. This image is at 300mm cropped , f/8, 1/60 sec, ISO 80. After this test image and several others I came to the conclusion that my settings during the partial ellipse will be f/8, 1/80 sec, ISO 100 adjusting those if needed depending on sky conditions. I’ll maintain those settings during totality bracketing the exposure settings as described above.
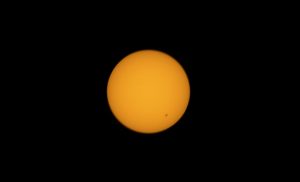
300mm cropped image of the sun, f/8, 1/60 sec, ISO 80
When it comes to ISO, you should set your camera to its native ISO—the lowest un-boosted ISO setting. In most cases it will be 100 or 200.
Composition Tips
If you are photographing the sun as the only subject in your image, you can certainly center the sun in the frame. But, feel free to position your subject using the rule of thirds, or place it somewhere else in the frame for potentially dramatic effects or a unique look.
If you are shooting a wide-angle image and want to include some foreground detail, be sure that whatever you include in the foreground will not block the path of the sun, and be careful not to let that scenery dominate the scene—the dramatic display of this rare event will focus all attention on the solar eclipse. Also, with a solar filter in place, the foreground scenery will not show up in a photograph, so you will likely need to make multiple exposures.
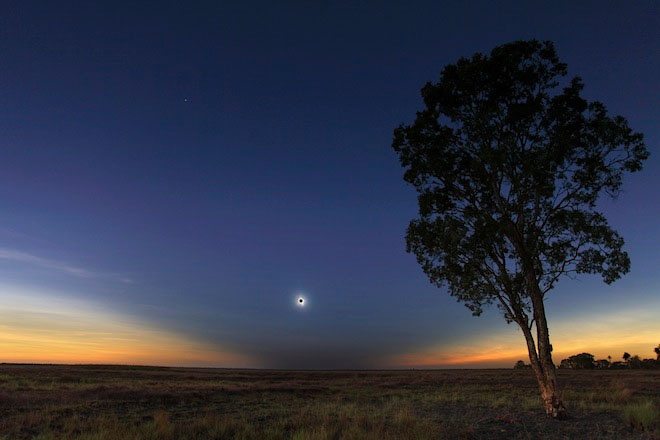
Photo Courtesy of Google Images.
Shooting the Eclipse: Telephoto Lens
Of course, you can just wait for totality, point your camera at the sun and moon, and snap a photo, but you will likely want to capture all the wonderful phases of the solar eclipse. This means you will need to track the sun across the sky for a few hours, and keep shooting as the eclipse moves toward totality and then back toward a full sun on the other side.
This is where planning comes in. How many photos do you want to take? Should you divide the eclipse up into equal parts by time and capture, for instance, one image every ten minutes before and after totality? If you are planning on a montage or image series, you will want a solid game plan going into the event. For those planning multiple exposures, know that the Earth’s rotation causes the sun to move the distance of one solar diameter through the sky approximately every two minutes so you’ll need to adjust your camera position on the tripod accordingly. The montage method is the one I’m going for during the eclipse.
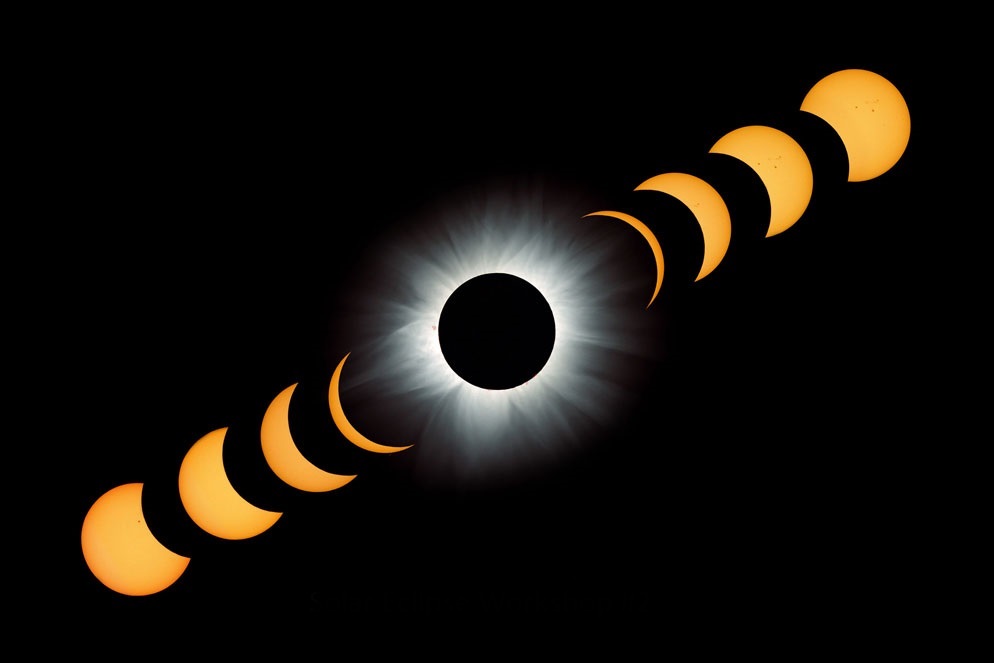
Solar Eclipse Montage. Image Courtesy of Google Images.
2 Comments
I’d love to print out these instructions for settings during eclipse day. From “Basic Gear” all the way to the bottom. I’d like to read up on it in the car on our way to Lincoln, NE, tomorrow. Just want to have a print copy in case internet is sketchy with so many people being around.
Thanks for linking this from Iowa Through The Lens on fb.
Angie Weidemann
I believe you can print this put by selecting the print option in your web browser. Safe travels and good luck dodging the clouds on Monday.
Willard