In yesterdays blog I wrote about the preferred aperture settings when capturing that perfect storm. However, in extreme weather photography aperture is only part of the exposure triad. Shutter speed and ISO are very important when you’re looking to capture a beautiful storm. First lets talk about ISO.
What is ISO
In very basic terms, ISO is simply a camera setting that will brighten or darken a photo. As you increase your ISO number, your photos will grow progressively brighter. For that reason, ISO can help you capture images in darker environments, or be more flexible about your aperture and shutter speed settings.
However, raising your ISO has consequences. A photo taken at too high of an ISO will show a lot of grain, also known as noise, and might not be usable. So, brightening a photo via ISO is always a trade-off. You should only raise your ISO when you are unable to brighten the photo via shutter speed or aperture instead (for example, if using a longer shutter speed would cause your subject to be blurry).
Preferred ISO Settings

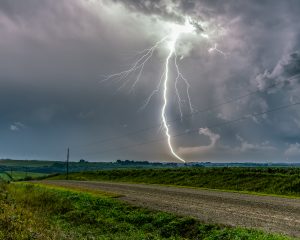
Southern IA Lightning 8 sec, F/9, ISO 400
During the day as long as light is plentiful keep the ISO low so you don’t introduce noise in your images. Normally I run my Nikon camera at ISO 64 or 100. This is what’s called the base ISO. Base ISO will vary from model to model so check your owners manual for details. As you head into evening or if its very cloudy and dark you may need to increase the ISO. Many cameras have what’s called auto ISO. With this setting you can set a minimum ISO (for example ISO 100) and you can tell the camera to increase ISO as light starts to decrease. This can come in handy when light conditions are changing very rapidly. If your shooting lightning during the day keep the ISO low. During the evening and into the night increase the ISO but don’t go to high as lightning can easily be blown out in a photo. I typically keep my night time ISO between 200 and 400 at night for lightning shots.
Shutter Speed
Shutter speed is the length of time the camera shutter is open, exposing light onto the camera sensor. Essentially, it’s how long your camera spends taking a photo. This has a few important effects on how your images will appear. In extreme weather photography things like clouds or fields of wheat, corn, or beans are moving in the wind. I keep my shutter speed set for a short exposure (1/200 to 1/1000 of a second) so I can capture the scene and freeze all the action. If the shutter speed is to slow then you’ll introduce blur in the photo. If that’s your thing then great. But, if you’re like me I like an image where the action is frozen. Typically I go no lower than 1/100 of a second when photographing storm during daylight hours.
Putting it all Together

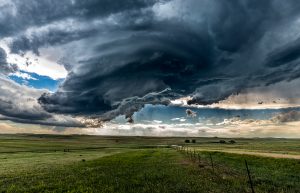
Wright, WY 1/100 sec, F/13, ISO 200
When people ask me what’s the perfect camera setting to capture a storm my answer is it depends. However, the settings listed below are my go to settings I use when capturing extreme weather photography.
Daytime – Aperture F/10 to 11, ISO 64 to 100, Shutter speed 1/200 or faster
Evening = Aperture F/5.6 to F/8, ISO 200 to 800, Shutter speed 1/100 or faster. If photo is too dark increase ISO. You may also need to place the camera on a tripod if the exposure times are increasing.
Night (mostly lightning shots) Aperture F/5.6 to F/14, ISO 200 to 400, Shutter 5 seconds or more.
These settings work for me. Use them as a starting point with your camera gear and see what works best for you. If your not happy with the photo adjust as needed. The big thing is practice these settings on your camera before heading out on a storm chase. As I’ve mentioned in past blogs know your camera inside and out so you’re not figuring things out as the storm is occurring in front of you.
The bottom line is have fun and enjoy yourself while on a chase. Its a lot of fun and when your relaxed and having a good time. Getting that perfect photo will come more easily. So get out there and stay safe this chase season.
©Willard Sharp